

Top

How to Build a Shipping Container Home Office

A shipping container home office looks efficient on paper: one steel box, a desk, and a quiet place to work. The reality is less tidy. Steel transfers heat quickly, amplifies rain, and can create condensation behind insulation. The International Organization for Standardization lists common containers at approximately 20 or 40 feet long, but usable interior space becomes smaller after insulation, wiring, ventilation, and finishes. That lost space matters when a chair meets a wall.

Industry data supports the broader shift toward modular construction. Grand View Research estimated the global modular construction market at more than $90 billion in 2023, with continued growth expected through 2030. UNCTAD’s Review of Maritime Transport also documents the enormous scale of global container movement, explaining why surplus units attract designers and homeowners. However, a used container is not automatically sustainable. Its condition, previous cargo, coatings, and transport distance require careful investigation.

Architect and container-home specialist Adam Kalkin has described the container as “a modern building block.” That idea is useful, but incomplete. A building block still needs a foundation, drainage, fire protection, daylight, and safe electrical systems. This guide will examine those decisions step by step, from selecting a structurally sound container to planning insulation and furniture.

The first sketch may look perfect. It probably is not.

Expect revisions. Expect unexpected costs. Most importantly, treat the shipping container home office as a real building, not a decorative steel box. Local professionals should verify structural changes, planning requirements, and workplace safety before construction begins.
How to Build a Shipping Container Home Office

Define the Office Purpose, Size, and Container Requirements

Before choosing a container, define the office’s daily purpose. A video-call studio needs controlled acoustics, stable lighting, and a clean background. A design workspace needs deeper desks, storage, and stronger electrical capacity. Occasional use requires less floor area. Do not size the room by the container shell alone.

A standard 20-foot container provides about 13.9 square meters externally, while a 40-foot unit provides about 28.3 square meters, according to ISO 668 dimensions. Interior walls, insulation, wiring, and ventilation reduce usable space. A 20-foot office may fit one desk, a narrow cabinet, and a compact chair zone. It can feel tight. My first layout placed storage behind the chair, creating awkward movement during calls. That mistake was easy to miss on paper.

Measure equipment before ordering modifications. Allow roughly 900 millimeters for a comfortable main walkway. Plan separate circuits for computers, heating, cooling, and lighting. The U.S. Department of Energy reports that windows can account for 25% to 30% of residential heating and cooling energy use. Therefore, window placement affects comfort and operating costs. Use shaded glazing where practical. A container is steel, not a naturally comfortable room. Insulation, vapor control, ventilation, and moisture detailing require qualified professionals and local code checks. Also question the container’s condition. Corrosion, dents, and unknown coatings may change the preparation budget.

Choose a Suitable Site and Check Local Building Regulations

A suitable site is the foundation of a safe shipping container home office. Visit the property after heavy rain, not only on a sunny afternoon. Look for standing water, soft ground, steep slopes, and difficult delivery access. A truck needs enough turning space to position the container safely. Check setbacks, property lines, easements, and utility locations before making any purchase.

Contact the local planning and building departments early. Ask whether the office is allowed under current zoning rules. Confirm permit requirements for foundations, electrical work, plumbing, insulation, and structural changes. Some areas require energy calculations, fire separation, or accessible entry routes. Flood zones and wildfire areas may involve stricter standards. A licensed professional should review large openings, roof loads, and anchoring details. Cutting steel without proper reinforcement can weaken the entire unit. I once underestimated delivery clearance; the site looked open, but a low branch blocked the final approach.

Tips: Request written guidance from officials. Measure the driveway twice. Keep copies of approvals and drawings. Ask about inspections before construction begins. Do not assume a container is automatically a legal building. Check drainage plans, soil conditions, and emergency access. Leave space for ventilation equipment and future maintenance. A low-cost site may become expensive after grading, retaining walls, or utility extensions. Recheck every requirement before work starts.

Plan the Layout, Insulation, Utilities, and Natural Lighting

How to Build a Shipping Container Home Office

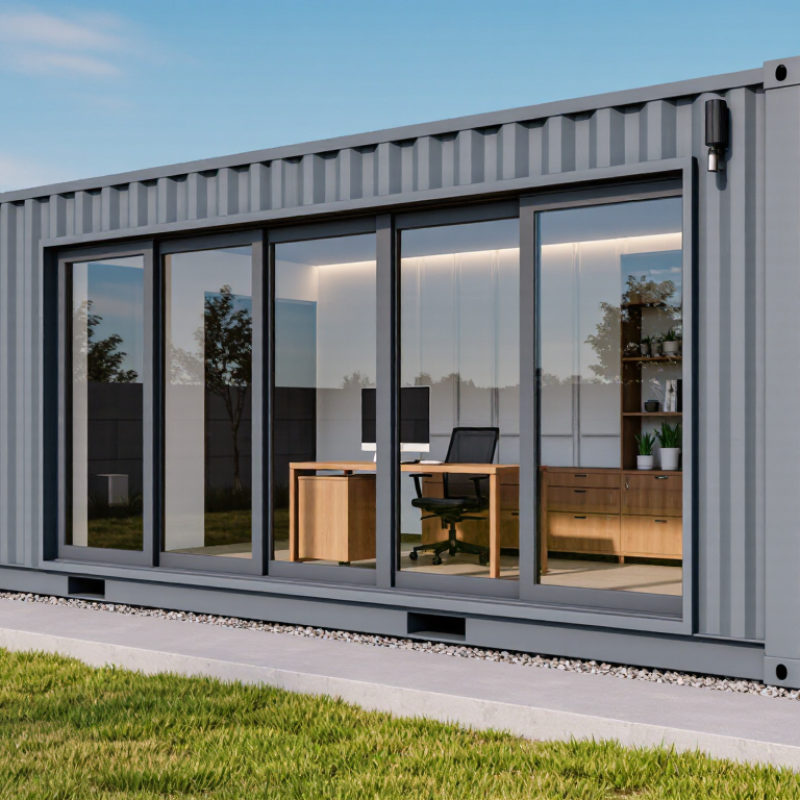
Plan the layout before cutting steel. A standard container is about 8 feet wide, so every cabinet matters. Place the desk near a long-side window. Keep a 30-inch walking path where possible. Put electrical outlets above desk height, not behind furniture. Reserve a service wall for plumbing, data cables, and ventilation. The U.S. Energy Information Administration reports that lighting used about 17% of commercial building electricity in 2018. Daylight can reduce that demand, but glare may ruin screen work.

Insulation needs careful detailing. Steel conducts heat quickly and creates thermal bridges. Use continuous insulation, sealed joints, and a ventilated interior cavity. A poorly sealed corner can produce condensation behind the wall. That problem is easy to miss. The U.S. Department of Energy identifies air sealing as a major part of energy-efficient construction. Include a small heating and cooling system, with fresh-air ventilation sized for the room. Follow local electrical, structural, and fire requirements. A licensed professional should review the final design.

Tips: Aim for roughly 300–500 lux on the desk, matching office-lighting guidance from the Illuminating Engineering Society. Add exterior shading before increasing glass area. Test window positions with a cardboard mock-up. I would avoid a roof skylight unless water drainage is exceptionally well planned. It looks bright on paper, yet summer heat can become uncomfortable. Leave access panels around utilities; hidden repairs become expensive repairs.

Modify the Container Structure and Install Essential Systems

How to Build a Shipping Container Home Office

Modifying a container starts with a structural survey, not a saw. I check corrosion, corner posts, floor condition, and previous repairs before planning openings. Large windows can weaken the shell, so a qualified structural engineer should design reinforcement frames. Steel box sections around each opening help transfer loads toward the corner posts. Measure twice. Cut once.

I usually install windows and doors after welding the frames, then seal every joint with compatible exterior sealant. Small gaps matter. Closed-cell insulation or insulated panels can reduce condensation, but ventilation remains essential. I leave a service cavity for cables and pipes, keeping them away from sharp steel edges. A raised, level floor protects wiring and improves comfort, although it reduces ceiling height.

Electrical work needs proper circuits, grounding, protection devices, and inspection by a licensed professional. Plumbing should include accessible shutoff valves and insulation against freezing. For heating and cooling, I calculate the room load instead of guessing from the container size. An efficient ventilation unit can remove stale air without wasting excessive heat. I once underestimated afternoon solar gain; the office became uncomfortable by noon. External shading would have helped. A smoke alarm, clear exit path, and moisture check belong in the installation plan. Local building rules and site conditions may change the details.

How to Build a Shipping Container Home Office - Modify the Container Structure and Install Essential Systems
Project Area Dimension or System Typical Planning Data Construction Notes
Container Selection Standard container size 20 ft long × 8 ft wide × 8 ft 6 in high A common starting point for a compact office. Confirm the actual dimensions before ordering because manufacturing tolerances and container condition vary.
Container Selection Approximate interior space About 19 ft 4 in long × 7 ft 8 in wide × 7 ft 10 in high Interior lining, insulation, flooring, and service cavities will reduce the usable dimensions.
Container Selection Approximate floor area About 146 sq ft before interior finishes This area can typically accommodate a desk, chair, storage, lighting, and a compact mechanical zone.
Site Preparation Support arrangement Level pads, piers, or a foundation designed for the site Keep the steel floor frame clear of standing water and provide access for inspection and maintenance.
Site Preparation Drainage clearance Slope finished ground away from the structure Local drainage, frost, wind, seismic, and flood requirements determine the final foundation design.
Structural Modification Window or door openings Size and location selected around furniture, daylight, and ventilation needs Engineering review required Cutting side rails, corner posts, or roof members can weaken the container. Reinforce modified openings according to local requirements.
Structural Modification Roof loading Verify snow, wind, equipment, and maintenance loads Do not assume the original roof is suitable for added equipment, a roof deck, or heavy finishes without structural verification.
Thermal Envelope Continuous insulation Use a code-compliant wall, roof, and floor insulation assembly Steel conducts heat quickly, so uninterrupted insulation and thermal-bridge control are important for comfort and condensation control.
Thermal Envelope Interior service cavity Allow space for wiring, outlets, data cables, and wall finishes A service cavity reduces the need to puncture the primary air and vapor control layers.
Moisture Control Air sealing Seal joints, penetrations, window frames, and utility entries Use compatible sealants and flashing details. Protect insulation from bulk water and provide a planned drying strategy.
Windows and Doors Daylight opening Place glazing on the best available orientation for natural light Exterior shading, low-emissivity glazing, and operable sections can reduce glare and overheating while supporting ventilation.
Electrical System Main supply Size the feeder from the calculated load, not from floor area alone A qualified electrician should determine conductor size, overcurrent protection, grounding, disconnects, and utility requirements.
Electrical System Dedicated circuits Provide separate circuits for high-load equipment where required Heating, cooling, water heating, and specialized equipment may require dedicated circuits under applicable electrical rules.
Electrical System Receptacle planning Place outlets near the desk, equipment wall, and cleaning area Follow local spacing, accessibility, grounding, and ground-fault protection requirements rather than relying on extension cords.
Data and Connectivity Network infrastructure Install conduits or data cabling before wall finishes Separate low-voltage wiring from power wiring as required, and leave an accessible route for future upgrades.
Heating and Cooling Heating and cooling capacity Select equipment using a room-by-room heat-loss and heat-gain calculation Oversized equipment can cycle frequently and control humidity poorly. Account for insulation, glazing, climate, occupancy, and equipment loads.
Ventilation Fresh-air strategy Operable windows, exhaust ventilation, or balanced mechanical ventilation A well-sealed office still needs controlled outdoor air. Follow applicable ventilation and indoor-air-quality requirements.
Lighting Task lighting Provide glare-controlled lighting at the desk and work surfaces Combine general, task, and daylight sources. Position monitors perpendicular to windows when possible to reduce reflections.
Fire and Life Safety Smoke and carbon-monoxide alarms Install devices where required by local code and fuel-burning equipment layout Maintain clear access to the exit, use code-compliant door hardware, and verify emergency egress requirements before construction.
Interior Fit-Out Clearance around the desk Plan comfortable circulation and chair movement before fixing furniture Use the narrow interior width efficiently by placing storage along one wall and keeping the main path unobstructed.
Finishes Wall and ceiling lining Use durable, low-maintenance interior panels or board systems Choose finishes that tolerate normal office humidity and allow access to electrical, data, and mechanical services where needed.
Commissioning Final inspection and testing Test electrical protection, ventilation, heating, cooling, alarms, and water management Complete before occupancy Obtain required permits and approvals, and retain drawings, equipment manuals, and inspection records.
Planning values are typical design references for a compact container office. Final dimensions, structural details, utility capacities, and safety provisions must be verified against the container condition, site conditions, and applicable local codes.

Finish the Interior and Prepare the Office for Daily Use

Finishing a shipping container office begins with controlling moisture and temperature. Steel walls transfer heat quickly, so install continuous insulation before covering them. Seal joints carefully, but leave service access for future repairs. The U.S. Department of Energy identifies air sealing and insulation as major strategies for reducing heating and cooling demand. I would also add a small ventilation system sized by a qualified professional. ASHRAE Standard 62.2 provides residential ventilation guidance based on floor area and occupancy.

Use moisture-resistant wall panels and low-emitting paints. Keep electrical wiring inside approved conduits, and have a licensed electrician inspect every connection. The Environmental Protection Agency recommends maintaining indoor relative humidity between 30% and 50%. A digital humidity meter near the desk makes that target visible. Check corners after rain. Condensation often appears there first.

The desk should face a window without creating screen glare. Add adjustable task lighting, a supportive chair, and cable channels along the lower wall. The Occupational Safety and Health Administration advises arranging monitors and input devices to reduce awkward neck and wrist positions. My first layout left too little space behind the chair. It looked tidy, but daily movement felt cramped. Leave a clear walkway of about 750 millimeters where possible. Install shelves only after checking the container’s framing. Test ventilation, lights, outlets, heating, and internet before moving in. Small failures become irritating quickly.

How to Build a Shipping Container Home Office: Daily Energy Use

This planning chart estimates electricity use after the interior is finished and the office is ready for daily work. Each value is calculated from a representative power rating multiplied by expected daily operating hours.

Estimated daily total: approximately 1,240 Wh, or 1.24 kWh. Actual consumption will vary with equipment efficiency, ventilation settings, daylight, and working hours.